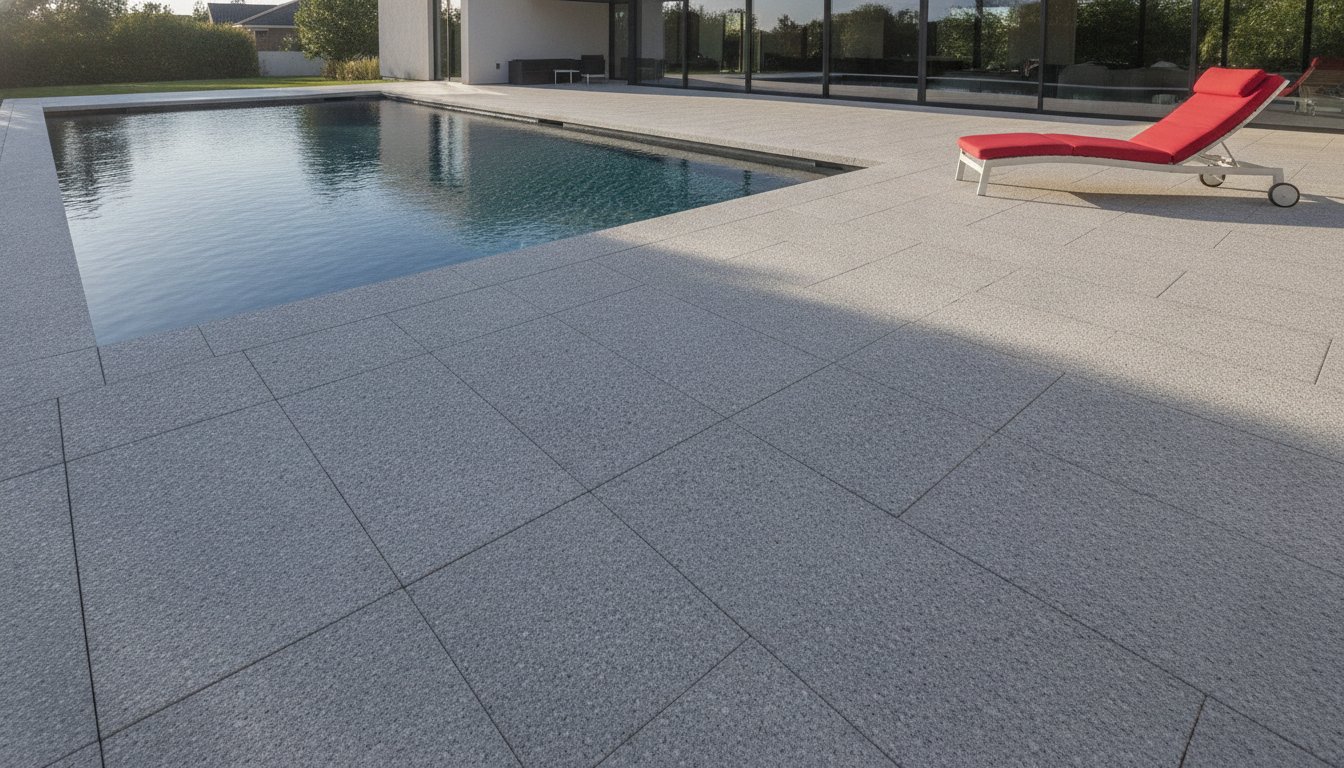
What if your garage was more than just a graveyard for oil stains and dusty concrete? Many homeowners settle for a dull, gray slab that peels the moment hot tires touch it, but your home deserves better than a temporary fix. If you're tired of scrubbing stubborn chemical spills or seeing your 400 square foot floor flake away, then it's time to demand a professional standard. Installing a high-grade garage floor epoxy system is about more than aesthetics; it's about protecting your property and your peace of mind. At Illuminated Coatings, we treat every slab as a canvas for a durable masterpiece that's built to withstand demanding environments.
You already know that a clean, organized space makes your daily routine smoother and adds significant value to your home. We promise to show you how professional-grade materials transform an ugly surface into a high-performance showroom that's practically indestructible. In this guide, we'll walk through the technical process of creating a slip-resistant, easy-to-clean environment that will turn heads for decades to come.
Key Takeaways
- Understand the critical difference between retail-grade paint and industrial resins to ensure your surface achieves a high-strength chemical bond.
- Learn why professional mechanical grinding is the only way to prevent peeling and overcome the invisible threat of moisture vapor transmission.
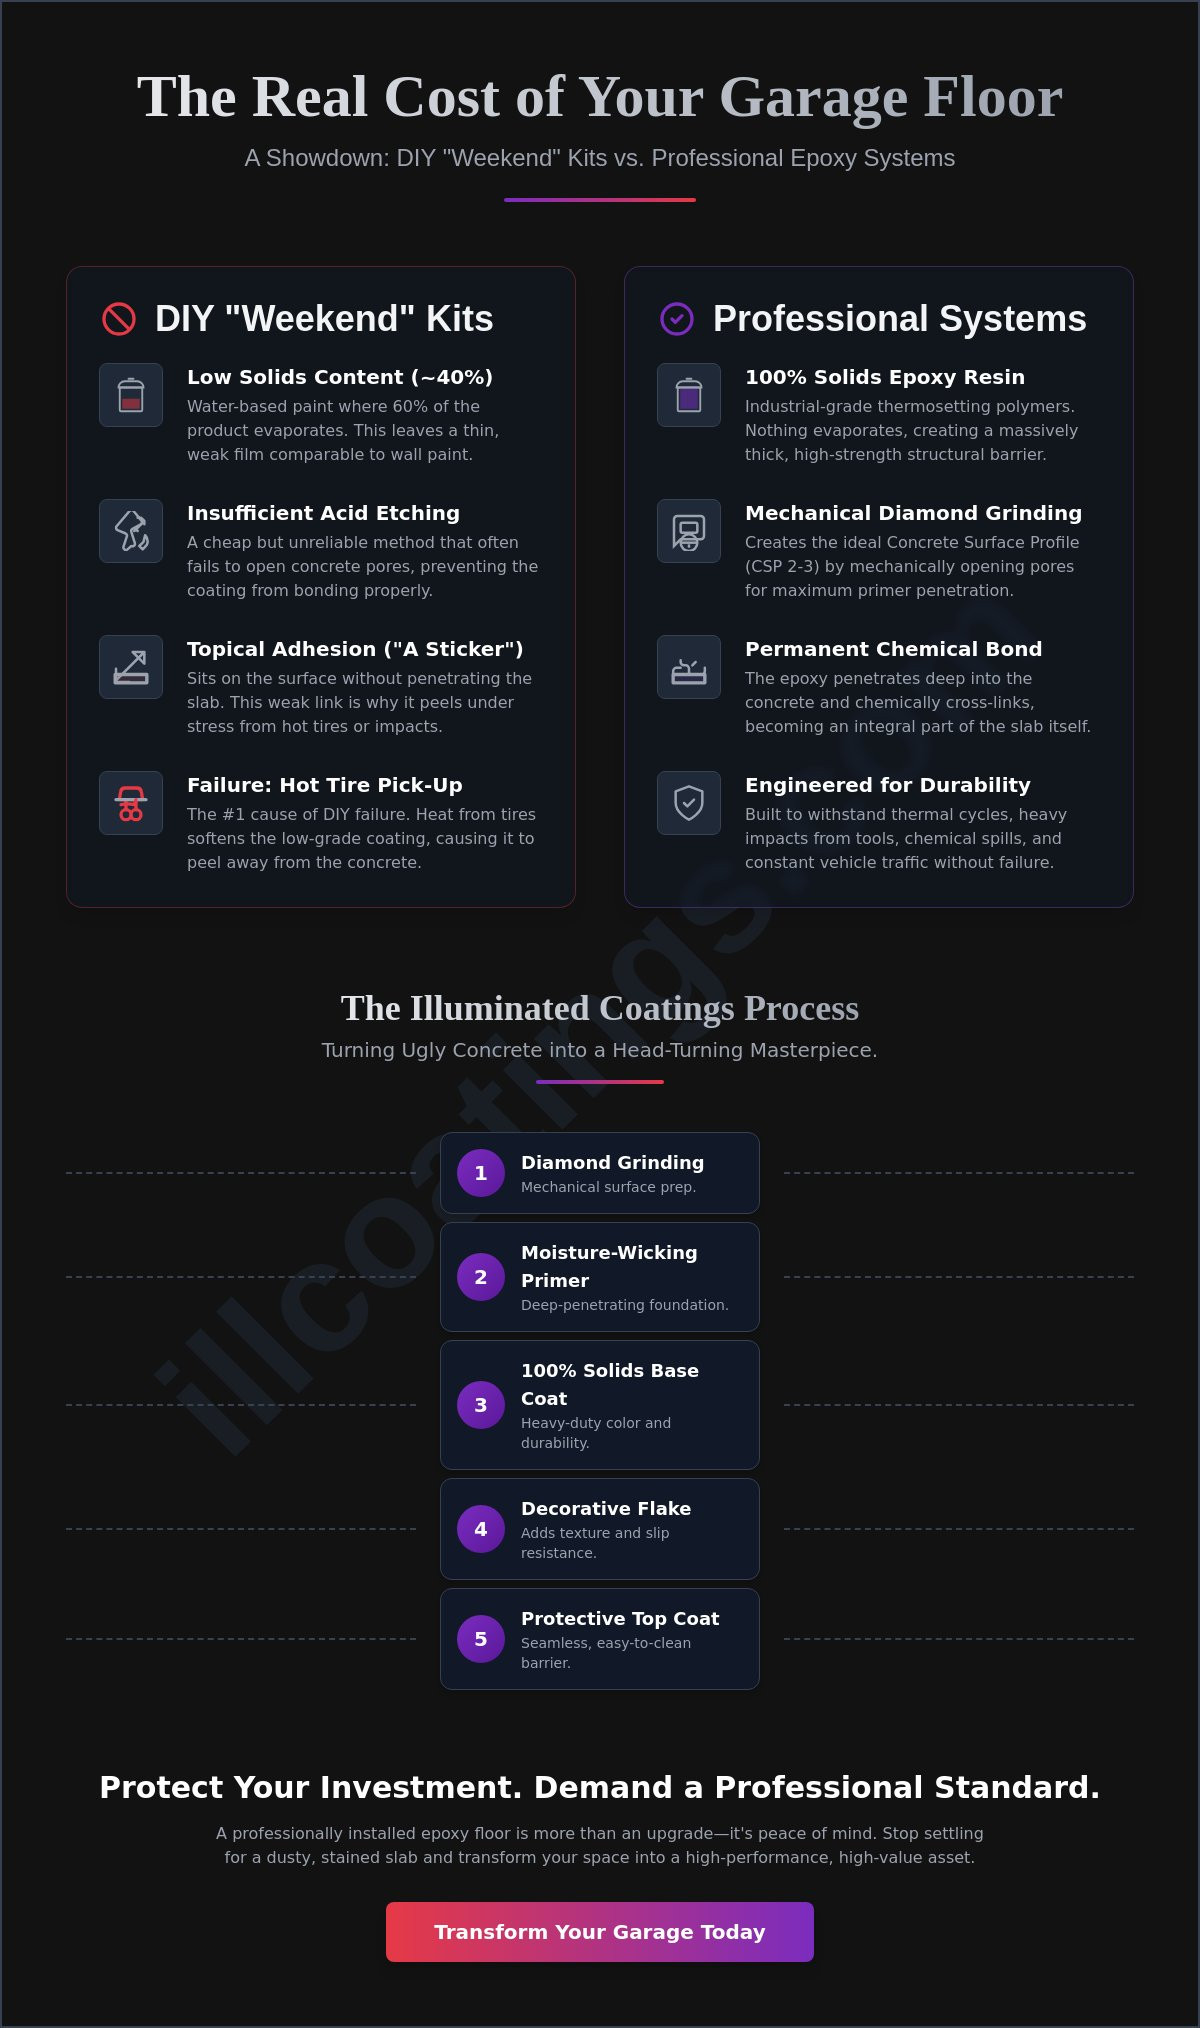
- Discover how professional garage floor epoxy installation protects your investment by avoiding the common pitfalls of DIY "weekend kits."
- Identify the specific coating system that fits your lifestyle, from heavy-duty workshop durability to high-end showroom aesthetics.
- See how our "Blue-Collar Artisan" approach transforms ugly concrete into a head-turning masterpiece that stands the test of time.
What is Garage Floor Epoxy and Why Does It Matter?
Your garage floor is likely the most abused surface in your home. If your concrete is currently a porous, dusty slab that absorbs every oil drip and salt stain, you're living with an "ugly" space that drags down your property's prestige. A professional garage floor epoxy system isn't a coat of paint. It's a technical transformation. Epoxy resins function as thermosetting polymers that trigger a chemical reaction, creating a high-strength bond that becomes part of the concrete itself. This isn't a cosmetic fix; it's a structural upgrade.
Many homeowners in Tampa and St. Petersburg mistake "epoxy paint" for a professional coating. Most big-box DIY kits are water-based and contain only 40% solids, meaning 60% of the product evaporates as it dries. At Illuminated Coatings, we use industrial-grade 100% solids epoxy. This difference determines whether your floor looks like a DIY project or a professional showroom masterpiece. Much like the precision required for high-end paint correction found at drippingautopros.com, we treat every floor as our livelihood because we know a high-performance finish is what makes a home turn heads.
The Anatomy of a Professional Coating System
- The Primer Layer: This is the foundation of success. We use a moisture-wicking primer designed for deep penetration into the concrete pores. If the primer doesn't bite into the slab, the entire system will eventually fail.
- The Base Coat: This is where the color and heavy-duty durability live. It's a thick, resilient layer that provides the "body" of the floor, ensuring it can handle the weight of heavy vehicles without flinching.
- The Decorative Flake: Beyond visual depth, these vinyl chips provide essential texture and slip resistance. They turn a flat surface into a multi-dimensional work of art that masks minor concrete imperfections.
Performance Beyond Aesthetics
A professional garage floor epoxy provides a seamless barrier that's virtually impenetrable. It offers total chemical resistance against gasoline, motor oil, and harsh road salts that typically eat through bare concrete. If you drop a heavy wrench, our industrial-grade coatings possess the impact resistance to absorb the shock without chipping or cracking. This level of protection is why our floors remain a point of pride for years.
Hot Tire Pick-Up is the #1 cause of DIY failure, occurring when heat from your tires softens low-quality paint and causes it to peel away from the concrete as you pull out of the garage. Our professional systems are engineered to withstand these thermal cycles. Whether you're in Spring Hill or downtown Tampa, your floor should be a durable masterpiece that stands up to the Florida heat. We focus on quality because we're blue-collar artisans who care about one thing: delivering a result that lasts a lifetime.
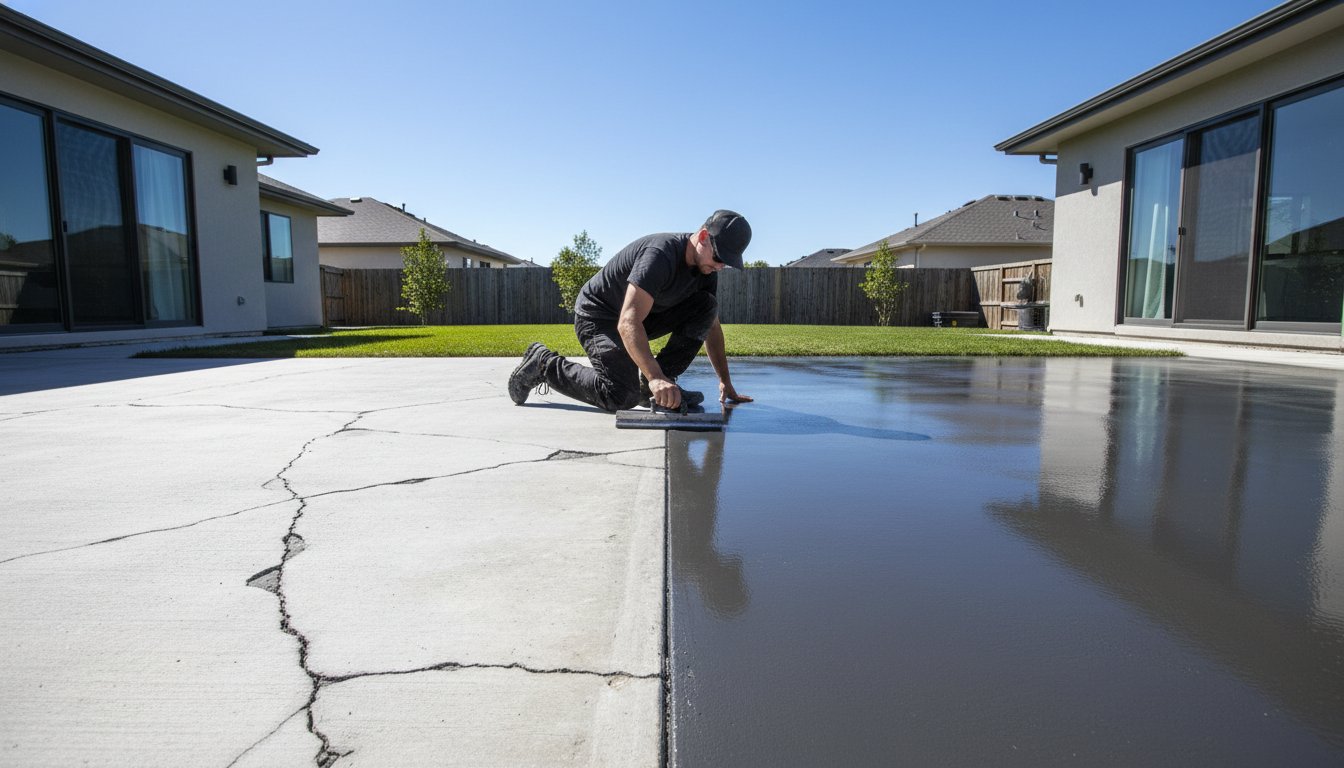
The Science of Adhesion: Why Professional Preparation Wins
If your concrete isn't prepped correctly, your garage floor epoxy will eventually peel. It's a simple fact of chemistry. We don't just "paint" a floor; we engineer a mechanical bond that lasts for decades. While many DIYers think a clean-looking floor is ready for resin, invisible contaminants like oils, sealers, and "laitance" (a weak, milky layer of cement dust) act as a barrier. If the resin can't penetrate the slab, it sits on the surface like a sticker rather than becoming part of the floor itself. This is why our team at Illuminated Coatings treats every project in Spring Hill and Tampa as a high-stakes transformation. Our livelihood depends on the integrity of this bond.
To achieve a professional-grade finish, we follow strict industry standards for concrete coatings. This involves using high-solids content resins, typically between 90% and 100%. Unlike water-based kits that evaporate and shrink, high-solids epoxy stays thick and builds a massive protective barrier. We also monitor local humidity and temperature levels with precision. If the dew point is too high or the slab is too cold, the chemical cross-linking fails. We only pull the trigger on an installation when the environmental conditions guarantee a durable masterpiece.
Diamond Grinding vs. Acid Etching
Most store-bought kits suggest acid etching because it's cheap and easy to ship in a box. However, acid etching is often insufficient for long-term bonding. It rarely achieves the Concrete Surface Profile (CSP) level 2 or 3 required for industrial-strength adhesion. We use heavy-duty diamond grinders to mechanically "open" the pores of your concrete. This process creates a texture similar to 60-grit sandpaper, allowing the garage floor epoxy to sink deep into the slab. If you want a floor that can turn heads in your neighborhood, grinding is the only way to ensure the resin anchors properly.
The Moisture Barrier Secret
Hydrostatic pressure is the silent killer of beautiful floors. Even if a slab looks dry, moisture vapor is constantly moving upward through the concrete. If this vapor is trapped under a cheap coating, it creates pressure that causes delamination and unsightly bubbles. We use moisture-mitigating primers to block this transmission and keep the topcoat secure. You can perform a simple DIY moisture check by taping a 2-foot square of clear plastic to your garage floor for 24 hours; if condensation forms under the plastic or the concrete turns dark, you have a moisture issue that requires professional-grade barriers. Our specialists in St. Petersburg use electronic moisture meters to get a precise 100% accurate reading before we ever mix a batch of resin.
DIY Kits vs. Professional Installation: The Real Cost
Don't fall for the "weekend warrior" marketing found in aisles of big-box retailers. A DIY kit might cost $150, but it's a calculated trap that often results in a failed garage floor epoxy project within 18 months. When you choose a professional installation, you aren't just buying material; you're investing in a specialist's livelihood. For a family-owned business like ours, every floor is a signature of our reputation. If a DIY kit fails, the manufacturer blames your "prep work." If our floor fails, it affects our ability to provide for our families. That accountability is the strongest warranty you can buy.
The technical gap between these options is staggering. Professional-grade coatings are typically 100% solids, meaning what we apply to the floor stays on the floor. DIY kits are often 50% water or solvents. As the floor dries, those solvents evaporate into the air, leaving you with a paper-thin film. We measure professional coatings in "mils," which is 1/1000th of an inch. A standard professional application ranges from 20 to 30 mils thick. In contrast, DIY "paint" kits often result in a layer only 2 or 3 mils thick. This 10x difference determines whether your floor survives heavy tool drops or peels the first time a hot tire touches it.
The Hidden Dangers of Rushing the Cure
Big-box kits often promise you can park your car in 24 hours. This is a dangerous marketing lie that ignores basic chemistry. While a floor might feel "dry to the touch" quickly, the "full cure" process takes significantly longer. Driving on a floor before the 72-hour mark often leads to hot tire pick-up, where the heat from your tires bonds to the resin and rips it off the concrete. Rushing the process also traps moisture vapor, which causes the finish to cloud or develop an ugly yellow ambering effect within the first 90 days.
Aesthetics: The Artisan Touch
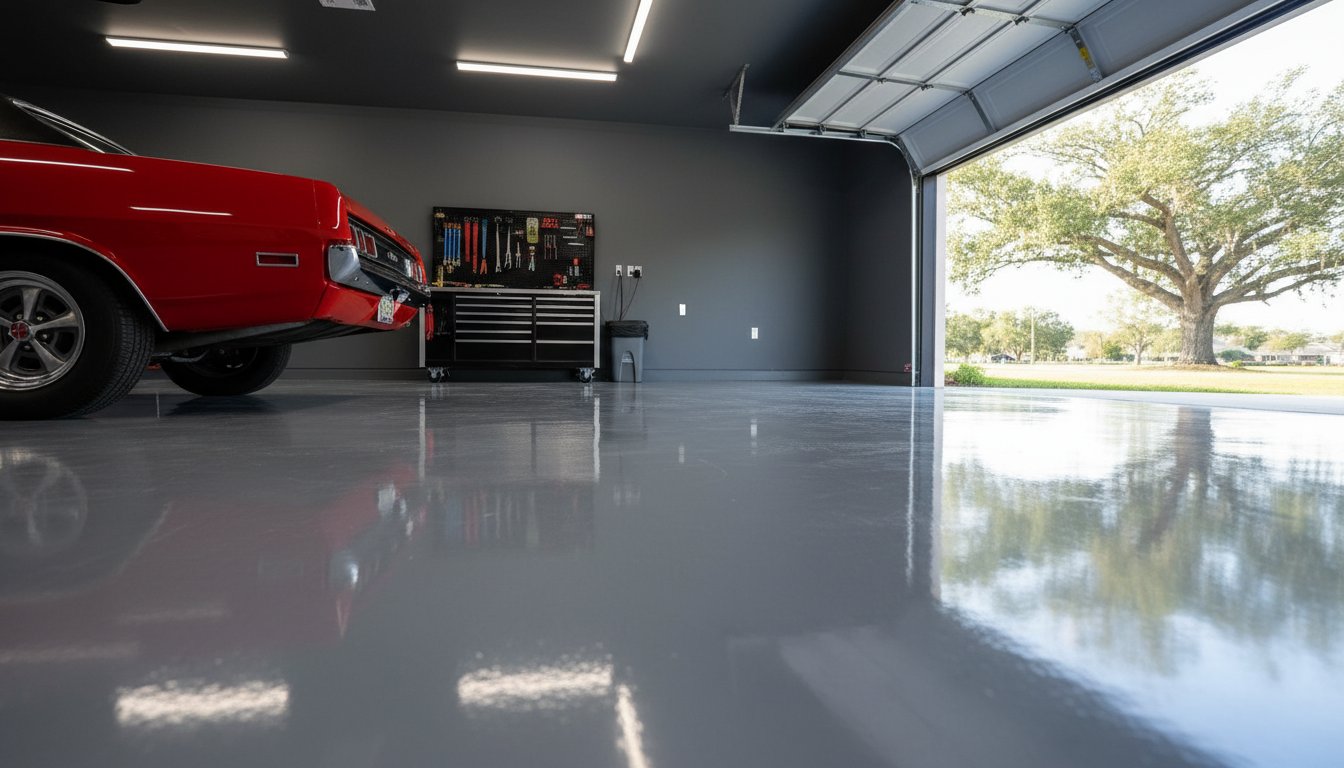
A professional garage floor epoxy application is a masterpiece, not a patch job. DIY projects frequently suffer from a "patchy" look because the installer can't maintain a wet edge or distribute decorative flakes evenly. We use custom flake blends and industrial-grade equipment to ensure a seamless, showroom finish. To protect that beauty, we apply a high-performance, UV-stable polyaspartic topcoat. This ensures your floor doesn't just look good today; it continues to turn heads for decades without fading or chalking under the Florida sun. If you want a transformation that adds real value to your property, the artisan touch is the only path forward.
Choosing the Right System for Your Lifestyle
Your garage shouldn't just be a place where junk accumulates; it’s an extension of your home’s value and your personal pride. If you use your space as a high-end car gallery, then a high-gloss, full-broadcast flake system provides the visual depth you crave. If you’re a hobbyist in Spring Hill running a heavy woodworking shop, you need a system built for impact and abrasion. We don't just pour chemicals. We craft a custom garage floor epoxy surface that matches your daily grind.
A high-traffic workshop requires a build that resists hot-tire pickup and chemical spills from oil or brake fluid. For these environments, we prioritize thickness and compression strength. If you want a floor that makes neighbors stop and stare, our granite-look flakes turn heads while hiding the hairline cracks common in Florida concrete. We integrate aluminum oxide additives into every "wet" zone to ensure your family stays safe on a slip-resistant surface. This isn't a temporary fix. It's a 15-year investment in your property's value. Maintenance is simple. A quick sweep and a damp mop with a pH-neutral cleaner keeps your masterpiece looking brand new without the need for waxing or buffing. To ensure the vehicles parked on your new surface look just as impressive, consider using professional car care products from SKY MAXPRO.
Polyaspartic vs. Epoxy Topcoats
Choosing the right topcoat is where professional expertise matters most. Polyaspartic coatings are the gold standard for Florida homes because they offer 100% UV resistance. They won't yellow or amber when exposed to the intense sun in a garage with open doors. Polyaspartic also allows for a 24-hour return-to-service time, which is 3 times faster than traditional resin. However, traditional epoxy remains a powerhouse for heavy industrial-chic residential shops. It provides a thicker build that levels out pitted concrete. While both offer a stunning gloss, polyaspartic provides slightly higher scratch resistance for those who are constantly moving heavy equipment.
Design and Customization
Your floor should complement your home’s architectural style. We offer everything from subtle earth tones to bold, metallic finishes that create an "illuminated" effect. This high-gloss finish isn't just for looks; it reflects up to 35% more ambient light, turning a dim garage into a bright, usable workspace. Using a full-broadcast flake density is a strategic move for older homes in Tampa or St. Petersburg. The dense texture hides 90% of existing concrete imperfections and salt palling, giving you a seamless, showroom-quality result that looks like natural stone.
Ready to transform your dusty concrete into a durable masterpiece? Get a professional quote from Illuminated Coatings today and see why we treat every floor as our own livelihood.
The Illuminated Coatings Process: Turning Concrete into Art
At Illuminated Coatings, we live by the "Blue-Collar Artisan" code. This philosophy means we combine the grit of hard labor with the precision of high-end design. We don't just "paint" floors; we build durable masterpieces that turn heads. Every square foot of garage floor epoxy we install is a reflection of our family's commitment to excellence. Our livelihood depends on the quality of your floor. If your garage doesn't look like a professional showroom when we're finished, we haven't met our own standards. We treat every project in Spring Hill, Tampa, and St. Petersburg as a signature piece of our portfolio.
The journey from ugly, oil-stained concrete to a pristine finish is a rigorous three-day transformation. We don't believe in "one-day" gimmicks that sacrifice long-term adhesion for speed. Instead, we follow a proven sequence that ensures your floor remains a point of pride for years to come. If you want a floor that stands up to heavy vehicles and chemical spills, you need a process rooted in chemistry and craftsmanship.
The Transformation Timeline
- Day 1: Precision grinding and crack repair. We use industrial diamond-tipped grinders to remove the top layer of "laitance" and open the concrete pores. If the surface isn't properly profiled, the coating won't bond. We also patch every crack and divot to create a seamless canvas.
- Day 2: Base coat application and full flake broadcast. We apply a high-solids resin base that sinks deep into the prepared concrete. While the coat is wet, we broadcast decorative flakes to the point of rejection. This means we cover every single inch so no base coat is visible.
- Day 3: Reclaiming excess flake and applying the protective masterpiece topcoat. After the floor cures, we scrape away the excess flake and vacuum the surface. We finish with a high-performance polyaspartic topcoat. This layer provides the UV resistance and high-gloss shine that defines a premium garage floor epoxy system.
Our Promise of Quality
We focus on one thing: the best coatings in the industry. Our team follows a strict "No-Shortcut" rule for surface preparation. We know that 90% of floor failures happen because the installer rushed the grinding phase. We take the time to do it right because we aren't just contractors; we're specialists who value our reputation in the community. You can trust that the materials we use are the same high-grade resins found in industrial hangers and high-end automotive shops.
Ready to see what your home is truly capable of? Our professional consultations provide a clear roadmap for your project. We'll assess your concrete's condition and help you choose a flake pattern that matches your style. Contact us today to transform your garage floor into a masterpiece.
Elevate Your Home with a Showroom Standard
Your garage is more than just a storage space; it's an extension of your home's value and potential. We've explored how a lasting garage floor epoxy finish depends on expert diamond grinding to achieve an ICRI Concrete Surface Profile of 2 or 3. This mechanical bond ensures your floor doesn't peel under hot tires like cheap DIY kits often do within 12 months of application. At Illuminated Coatings, we treat every project as our livelihood because our family's reputation is on the line with every square foot we coat. We're a family-owned team that combines artisan craftsmanship with industrial-grade materials designed to withstand 10,000 pounds of vehicle traffic without failing. We don't cut corners on preparation because we're obsessed with creating a finish that turns heads every time the garage door opens. It's time to stop settling for stained, dusty concrete and start enjoying a durable masterpiece that reflects your pride of ownership. Our proven process transforms your workspace into a professional-grade environment that stands the test of time. You deserve a floor that works as hard as you do.
Get Your Free Quote for a Masterpiece Garage Floor
Frequently Asked Questions
How long does garage floor epoxy really last?
A professional garage floor epoxy installation lasts between 10 and 20 years in a typical residential setting. We treat every project as a masterpiece because our livelihood depends on the durability of our work. If you choose high-solids resins, your floor will resist impact and chemicals for two decades. This transformation turns your ugly concrete into a high-performance showroom that stands the test of time.
Can I apply epoxy over a previously painted or coated floor?
You shouldn't apply new epoxy over old paint because the resin won't bond to the surface. We use industrial diamond grinders to remove 100 percent of previous coatings and open the concrete pores. If the slab isn't bare, the new layer will peel within 12 months. Proper mechanical preparation ensures your investment stays anchored to the foundation for years to come.
What is "hot tire pick-up" and how do I prevent it?
Hot tire pick-up happens when heat from your tires causes low-grade coatings to delaminate and stick to the rubber. You prevent this by using industrial-grade garage floor epoxy with a high solids content. These resin-bound systems withstand temperatures exceeding 200 degrees Fahrenheit. Our family-owned business focuses on these high-performance materials to ensure your floor never peels under the weight of a warm vehicle.
Is garage floor epoxy slippery when wet?
Standard epoxy is slippery when wet, but we integrate slip-resistant aggregates to ensure your safety. Adding decorative flakes or aluminum oxide increases surface traction by approximately 35 percent. This is vital in Florida's humid climate where moisture often collects on concrete surfaces. We prioritize your family's safety by creating a garage floor epoxy surface that is both a visual masterpiece and a secure environment.
How long do I have to wait before driving my car on the new floor?
You can walk on the surface after 24 hours, but you must wait a full 72 hours before parking a vehicle on it. The chemical bonding process requires this time to reach 90 percent of its total strength. If you drive on it too early, you risk permanent indentations in the finish. Following this timeline ensures your floor remains a showroom-quality feature that will turn heads for years.
What is the difference between epoxy and polyaspartic coatings?
Polyaspartic coatings cure significantly faster and offer 4 times the impact resistance of standard epoxy. While epoxy provides an incredible bond to the concrete, polyaspartic topcoats are 100 percent UV stable and won't yellow in the sun. We often combine these technologies to create a durable masterpiece. This hybrid approach gives you the best of both worlds; deep penetration and a rugged, high-gloss finish.
Do I need to repair cracks in my concrete before the epoxy is applied?
Yes, you must repair every crack and pit to achieve a seamless, professional finish. We use specialized polymer menders to fill voids, as 90 percent of coating failures stem from improper substrate preparation. If you skip this step, the cracks will eventually telegraph through your new surface. Our artisan approach ensures the concrete is perfectly level before we begin the transformative coating process.
How do I clean and maintain my new epoxy floor?
Maintain your floor by sweeping regularly and mopping with a mixture of 4 ounces of clear ammonia per gallon of water. Avoid using citrus or vinegar cleaners, as these acids can dull the high-gloss shine over 6 to 12 months. A soft foam squeegee is the best tool for removing excess water without leaving streaks. This simple routine keeps your floor looking like a professional showroom for its entire lifespan.