You spent the weekend grinding the concrete and carefully pouring your resin, only to wake up to a milky, dull haze instead of a mirror-like shine. It’s a gut-wrenching moment that makes many homeowners fear they’ve just flushed their hard-earned money and time down the drain. If your floor looks more like a foggy morning than a high-end showroom, you’re likely dealing with a chemical reaction to moisture or a critical mixing error. Mastering the troubleshooting cloudy epoxy finish process is the only way to save the project without the nightmare of grinding the entire floor off to start over.
We believe every floor should be a point of pride, not a source of stress. You don’t have to settle for a botched result or get lost in the sea of conflicting advice between hobbyist resins and industrial-grade coatings. This guide identifies the exact culprit behind your cloudy finish and provides the professional methods needed to restore a gallery-quality, high-gloss surface. We’ll provide a clear explanation of the failure and a step-by-step fix that works for garage floors and patios alike, giving you the confidence to prevent these issues in all your future projects.
Key Takeaways
- Identify the hidden chemical triggers, such as amine blush and rising moisture vapor, that transform a brilliant shine into a milky, disappointing haze.
- Follow our professional guide for troubleshooting cloudy epoxy finish to see if your floor can be restored with a surface buff or if it requires deeper remediation.
- Learn why the temperature of your concrete substrate matters more than the air temperature when it comes to preventing environmental sabotage.
- Master the nuances of proper mixing ratios and induction times to ensure your coating achieves a gallery-quality, crystal-clear cure.
- Discover how industrial-grade diamond grinding and specialized resins provide the structural foundation needed to prevent cloudiness before it starts.
What Causes Cloudy Epoxy? Understanding Amine Blush and Moisture Traps
If you see a milky film on your new garage floor, don't assume it's just dust or a bad batch of product. You're likely looking at a specific failure in the Epoxy resin chemistry. While hobbyists often blame micro-bubbles, professional-grade floor coatings usually fail due to environmental interference. There is a distinct visual difference between the two. Micro-bubbles look like tiny, individual pinpricks of air trapped in the resin, often caused by over-mixing. Chemical cloudiness, however, is a widespread, amorphous haze that obscures the concrete beneath it. If your floor looks foggy rather than bubbly, the culprit is almost certainly moisture or a chemical blush.
Amine Blush: The Invisible Culprit
Amine blush occurs when the amine hardener in your epoxy reacts with moisture and carbon dioxide in the air before it can fully cure. This is a common disaster in high-humidity environments. If the air is too damp, the hardener migrates to the surface instead of staying locked in the chemical bond. It creates a cloudy, waxy, or oily film that looks like a smudge you can't wipe away. This isn't just an aesthetic problem; it's a structural one. If you try to apply a topcoat over amine blush without professional remediation, the new layer won't bond. It will eventually peel and flake off, turning a simple haze into a total floor failure. Troubleshooting cloudy epoxy finish issues usually begins by identifying this greasy surface residue.
Subfloor Moisture Vapor Transmission
Concrete is a porous material that acts like a hard, dense sponge. Even if the surface feels dry to the touch, moisture is often moving through the slab from the soil below. Moisture vapor transmission is the upward movement of water through porous concrete. When you seal that concrete with a non-porous epoxy, the rising vapor gets trapped against the underside of the coating. During the curing process, the epoxy undergoes an exothermic reaction, generating its own internal heat. This heat can actually pull more moisture out of the concrete, trapping it in the resin and creating a milky, white haze that lives deep within the coat.
If you want to avoid this, perform a simple "plastic sheet test" before you mix your first gallon. Tape a 2-foot by 2-foot square of heavy plastic to your floor and seal the edges with duct tape. If you see condensation or dark, damp concrete under that plastic after 24 hours, your slab is too wet for standard coatings. Identifying these moisture traps early is the hallmark of a specialist mindset. If you ignore the moisture levels in your substrate, you're essentially gambling with the longevity of your investment.
Environmental Culprits: How Humidity and Temperature Sabotage Your Finish
The weather outside doesn't just affect your mood; it dictates whether your resin cures into a crystal-clear shield or a muddy mess. Troubleshooting cloudy epoxy finish issues often reveals that the environment was the primary saboteur. High humidity acts as a physical barrier. Water molecules in the air collide with the resin's chemical components, interrupting the delicate cross-linking process. This interference leaves the finish soft, hazy, and prone to early failure. If the air is thick with moisture, the resin simply cannot bond with the density required for a gallery-quality shine.
The Critical Rule of the Dew Point
Professionals never start a pour based on the thermostat alone. The dew point is the temperature where air becomes saturated and water vapor condenses into liquid. If your concrete substrate is cold, it acts as a magnet for this moisture. You must ensure the floor temperature is at least 5 degrees above the current dew point. Use an infrared thermometer to verify the actual temperature of the concrete, not just the air in the room. Coating a floor in the early morning when the slab is still chilled from the night is a recipe for disaster. The invisible moisture settling on that cold concrete will trap a milky haze under your epoxy before you even finish the first section.
Managing Your Work Environment
Controlling the workspace is vital for a successful transformation. While some hobbyist sources suggest working in up to 75% humidity, we recommend staying below 60% for high-performance garage floor epoxy. If you're working in a damp space, run a dehumidifier for at least 24 hours before you begin and continue for 24 hours after the pour.
Temperature management requires a specialist mindset. Avoid using propane heaters to warm your garage during the cure. Propane combustion releases significant amounts of water vapor into the air. This moisture settles directly onto your wet resin, causing immediate blushing and cloudiness. If you must add heat, use electric or indirect-fired heaters that provide dry air. Rushing the application window during a humid spell or a cold snap is the fastest way to turn a high-end craftsmanship project into a costly remediation job. Patience and environmental monitoring are the only ways to guarantee that mirror-like finish you're after.
Mixing and Ratio Errors: The Chemistry Behind the Fog
Precision is the backbone of every gallery-quality floor. When you treat epoxy like a casual DIY project, the chemistry often fights back. Troubleshooting cloudy epoxy finish issues frequently leads straight back to the mixing station rather than the environment. If the ratio of resin to hardener is off by even a small percentage, the chemical chain remains incomplete. This imbalance leaves the finish permanently soft and covered in a persistent, hazy fog that no amount of polishing can fix. It isn't just a surface blemish; it's a structural failure of the resin itself.
The "induction time" is another critical factor where many projects fail. Some industrial-grade resins require a specific rest period in the bucket to kickstart the chemical reaction before application. If you pour the mixture onto the cold concrete too soon, the reaction is stunted. This creates an uneven cure that manifests as a milky cloud across the surface. Additionally, air entrainment is often confused with chemical clouding. If you use a high-speed mixer, you're essentially whipping the resin like egg whites. This creates a froth of millions of microscopic bubbles. To the naked eye, this looks like a cloudy haze, but under a magnifying glass, the individual air pockets become visible.
The Two-Bucket Mix Method
The Two-Bucket Mix Method is a non-negotiable standard for professional artisans. You start by mixing your components in the first bucket for three minutes using a low-speed drill. Then, you pour the entire contents into a second, clean bucket and mix for another sixty seconds. This ensures every drop is homogenized. Most importantly, you should never scrape the sides of the bucket when pouring onto the floor. The resin clinging to the walls is almost always under-mixed. If that raw material hits your substrate, it will create unsightly cloudy streaks or tacky spots that ruin the visual transformation.
Solvent Contamination and Compatibility
Contamination is a silent saboteur in the world of coatings. Using low-grade mineral spirits to clean your tools or the floor leaves a thin, oily film that prevents the epoxy from bonding correctly. This lack of compatibility triggers a chemical rejection, often appearing as a white blush. While cheap DIY kits frequently use high solvent loads to make application easier, these solvents are prone to trapping moisture and causing cloudiness. Be cautious with alcohol-based dyes as well. Certain pigments react poorly with high-build epoxies, causing the resin to turn opaque the moment they're introduced. Stick to manufacturer-approved tints to maintain that crystal-clear depth and industrial strength.

How to Fix a Cloudy Epoxy Floor: Professional Remediation
Fixing a hazy floor requires more than a simple polish or a second layer of resin. If you've already identified the cause through the troubleshooting cloudy epoxy finish process, you know that surface cloudiness is often a chemical film, while deep cloudiness is a structural failure. Simply pouring more epoxy over a cloudy finish is a common mistake that leads to total delamination. If amine blush or waxy residues are present, the new layer will fail to bond and peel away within weeks. Professional remediation follows a strict, mechanical process to restore that lost brilliance.
- Step 1: Depth Assessment. Determine if the haze is on the surface by wiping a small area with a damp cloth. If the clarity returns momentarily while wet, the issue is likely surface-level blush. If it stays cloudy, the problem is deep within the coat.
- Step 2: Surface Scouring. Use a floor buffer or an orbital sander with 80-120 grit sandpaper. You must remove the top micro-layer of the resin to reach clean, unaffected material.
- Step 3: The Solvent Wipe. Scrub the sanded surface with denatured alcohol or a high-grade solvent. This step is critical to dissolve and lift away the waxy amine blush that sanding alone can't fully remove.
- Step 4: Clinical Cleaning. Vacuum the floor with a HEPA-filtered shop vac and follow up with a lint-free tack-rag. The surface must be surgically clean before proceeding.
- Step 5: High-Solids Topcoat. Apply a professional-grade polyaspartic or high-solids urethane finish. These materials offer superior clarity and UV resistance compared to standard epoxy.
When to Sand vs. When to Grind
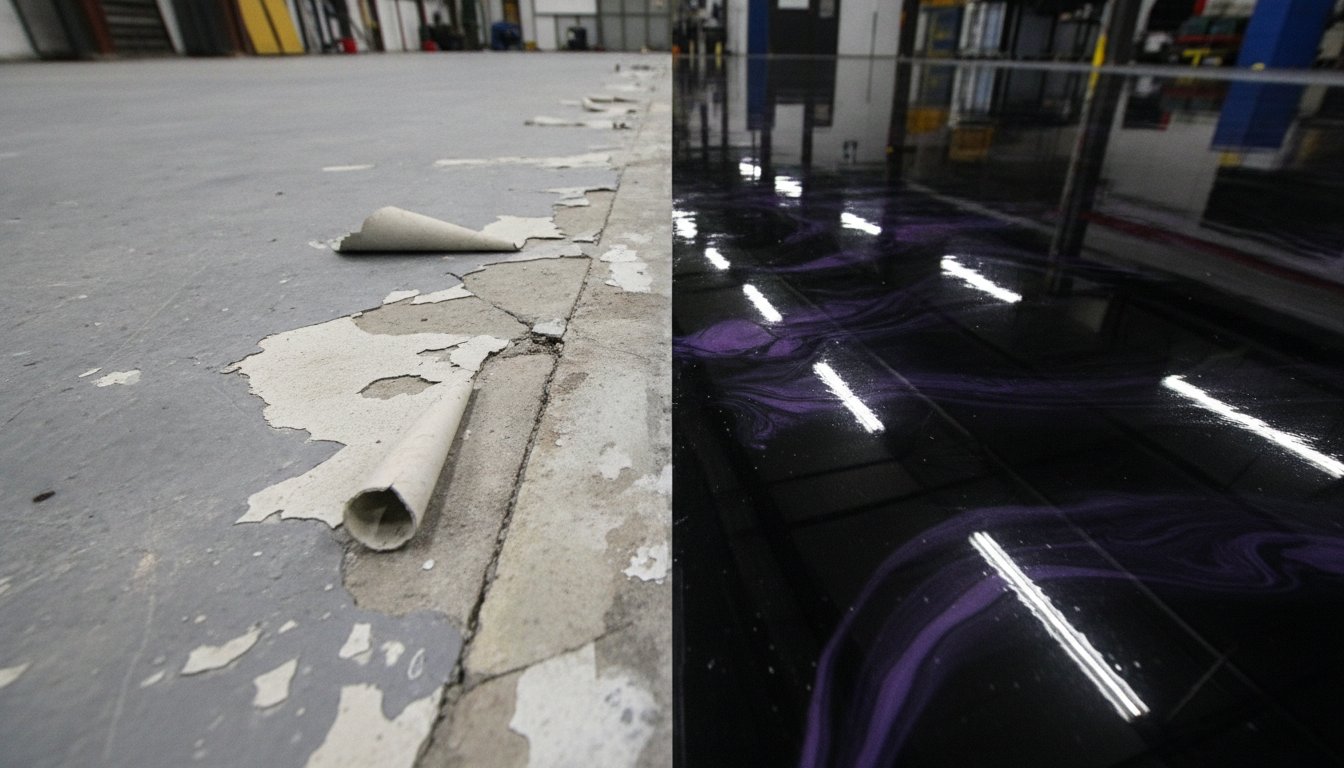
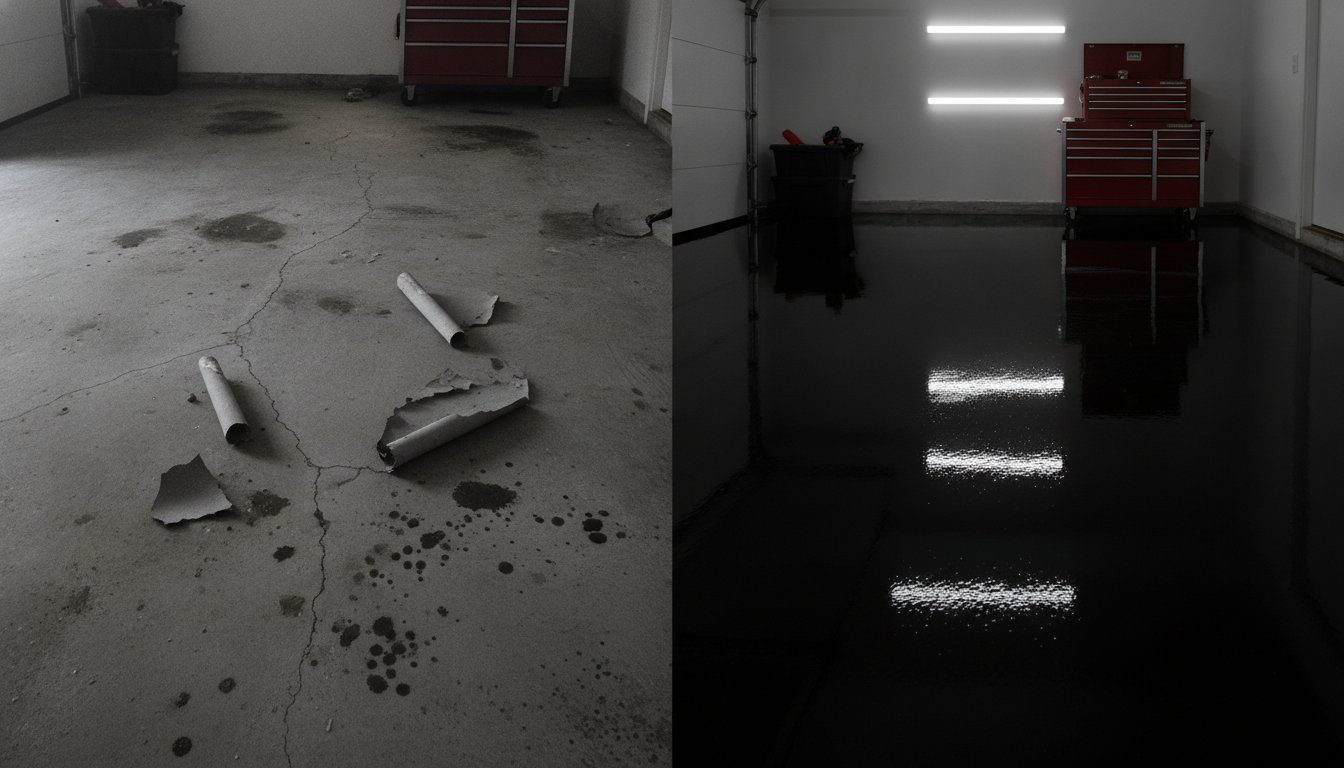
Light surface cloudiness or minor "blushing" can usually be cured with aggressive sanding. However, if the epoxy is soft, tacky, or showing signs of bubbles rising from the concrete, sanding won't save it. This indicates a total bond failure or an off-ratio mix. In these cases, the only path to a gallery-quality result is to perform a full grinding concrete service. Removing the failed material back to raw, open-pore concrete allows you to start over with a proper structural foundation. Don't waste time trying to "save" a floor that is chemically compromised; a fresh start is often the fastest route to transformation.
Restoring the Gloss
Once the floor is scoured and cleaned, the new topcoat fills the microscopic scratches left by the sandpaper, acting like a clear coat on a car to restore depth and shine. Mechanical abrasion is the only way to guarantee a mechanical bond after a blush occurs. While some hobbyist blogs suggest "polishing" the haze away with a cloth, this is physically impossible for a 500-square-foot garage. Using a polyaspartic finish instead of a second epoxy layer provides a harder, more scratch-resistant surface that won't yellow over time. This professional approach ensures your floor isn't just fixed, but upgraded to an industrial-strength masterpiece.
Professional-Grade Prevention: The Illuminated Coatings Standard
True craftsmanship starts long before the resin hits the floor. While many homeowners find themselves troubleshooting cloudy epoxy finish issues after a weekend DIY attempt, professional results are built on a foundation of industrial-grade preparation and superior material chemistry. We don't just offer a service; we deliver a transformation that elevates a standard garage into a gallery-quality space. This level of excellence requires a calculated approach to every variable, from the moisture levels in the concrete to the ambient humidity in the air. By treating every project as a reflection of our own professional survival, we ensure that the finished product is as durable as it is beautiful.
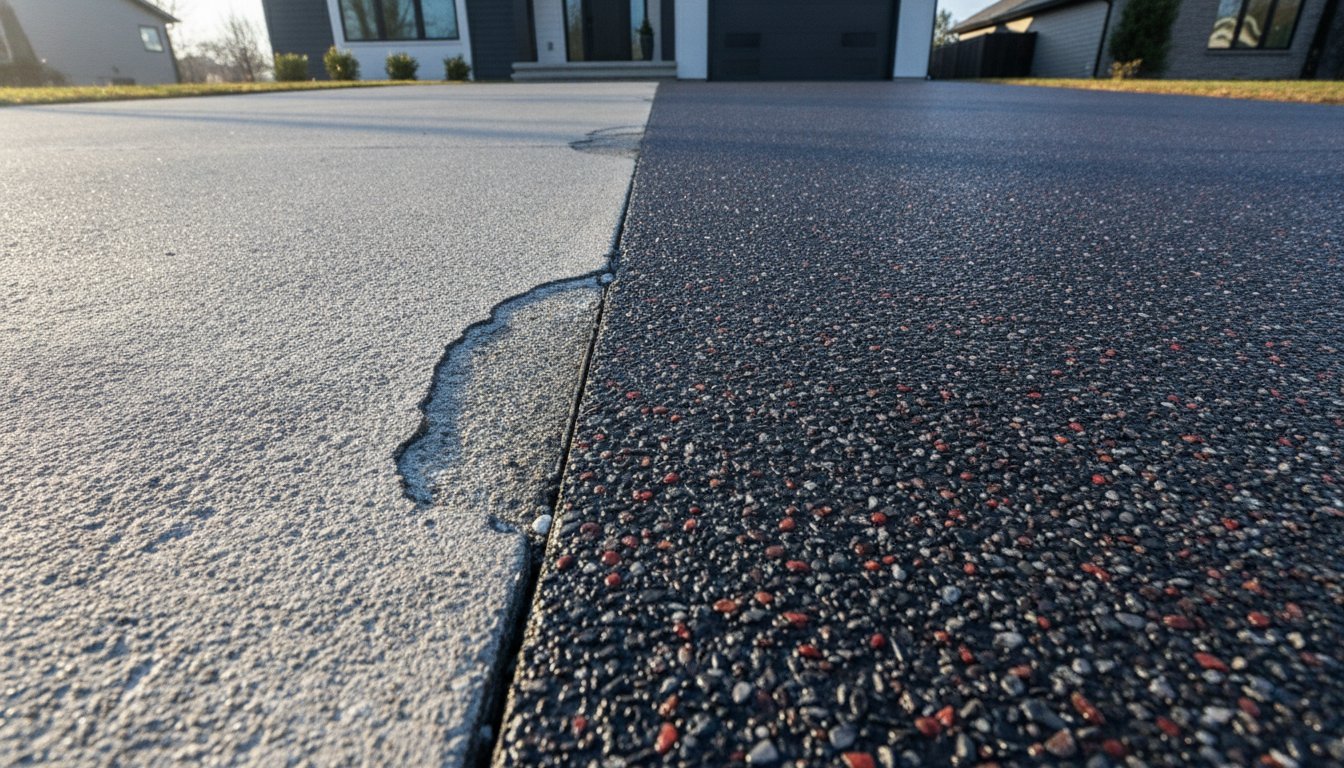
The prevention of cloudiness begins with mechanical diamond grinding. Unlike the weak acid etching found in consumer kits, industrial grinding creates a specific concrete surface profile (CSP) that allows the resin to penetrate deep into the substrate. This mechanical bond is the only way to prevent moisture vapor from becoming trapped and creating a milky haze. We utilize advanced moisture testing, adhering to ASTM F1869 standards, to verify that the slab is ready for a high-performance coating. If the moisture emission rate is too high, we don't just cross our fingers and pour. We use specialized moisture-vapor barriers to seal the concrete, ensuring the final finish remains crystal clear for years to come.
Why DIY Kits Often Fail
The primary reason for failure in big-box store products is their low solids content. Many DIY kits are water-based or heavily diluted with solvents, making them easier to spread but significantly more prone to blushing and clouding. These products often lack the robust UV inhibitors found in professional-grade Garage Floor Epoxy. Without these additives, the resin begins to yellow and haze the moment it's exposed to sunlight. Our industrial-strength resins are engineered with 100% solids, providing a dense, non-porous shield that resists the chemical reactions and environmental interference that sabotage cheaper alternatives.
The Transformation Promise
At Illuminated Coatings, we understand the frustration of a failed project. We've seen countless homeowners waste time and money on solutions that simply don't hold up to the high stakes of daily life. Our "blue-collar artisan" mindset means we possess the refined eye needed for aesthetics and the grit required for heavy-duty manual labor. We don't just fix a cloudy mess; we replace it with a point of pride for your home. We manage every climate variable and substrate condition to guarantee a mirror-like shine that stands the test of time. Tired of troubleshooting? Let the experts at Illuminated Coatings handle your transformation.
Restore Your Vision for a Flawless Floor
Cloudy epoxy is more than a minor blemish; it's a chemical signal that something went wrong during the cure. Whether you're dealing with the waxy residue of amine blush or the trapped moisture of a subfloor vapor trap, understanding the root cause is the first step toward a permanent fix. You've learned that troubleshooting cloudy epoxy finish issues requires a mechanical solution, usually involving aggressive sanding or diamond grinding to create a fresh, bondable surface. Restoration isn't about covering up mistakes but rebuilding the floor with industrial-strength materials like polyaspartic topcoats that offer crystal-clear depth and durability.
Illuminated Coatings is a family-owned and operated business established in 2021. We are specialists in Vuba Stone and high-performance coatings, dedicated to the high standards of blue-collar artisan craftsmanship. We treat every project with the focus and accountability required to ensure your property reaches its full potential. If you're tired of staring at a failed DIY attempt and want a gallery-quality transformation that lasts for decades, we're ready to help. We believe the quality of our work is a direct reflection of our personal commitment to your home.
Get a Professional Quote for Your Floor Transformation and let us bring brilliance back to your space. You deserve a floor that remains a point of pride for years to come.
Frequently Asked Questions
Can I just pour another layer of epoxy over a cloudy finish?
No, you should never pour a fresh layer directly over a hazy surface without preparation. If the cloudiness is caused by amine blush, that waxy film acts as a bond breaker. Your new layer will fail to adhere and eventually peel off in large sheets. You must mechanically abrade the surface with a sander and perform a thorough solvent wipe to ensure the new coating can form a structural bond.
Is cloudy epoxy still durable, or is the structure compromised?
Most cloudy finishes are structurally compromised to some degree. If the haze stems from improper mixing ratios or moisture interference during the cure, the resin hasn't achieved its full industrial strength. This often results in a floor that is too soft to withstand heavy vehicle traffic or too brittle to resist impacts. A compromised finish won't provide the long-term protection your concrete requires.
How do I know if my epoxy has amine blush or just air bubbles?
You can tell the difference by looking closely at the texture of the haze. Air bubbles appear as millions of tiny, distinct spheres trapped within the resin. Amine blush looks like a greasy, dull smudge or a milky veil across the floor. When troubleshooting cloudy epoxy finish problems, try wiping a small area with a damp rag; if the clarity returns while the surface is wet, you're likely dealing with a surface blush.
Will a cloudy epoxy finish clear up on its own as it cures longer?
A cloudy finish will never clear up on its own. Epoxy is a thermosetting plastic, which means once the chemical reaction is complete, the visual state is permanent. The haze is locked into the polymer matrix. The only way to restore a gallery-quality shine is through mechanical remediation or a total grind and restart.
Can I use a heat gun to remove cloudiness after the epoxy has hardened?
A heat gun is useless once the resin has hardened. While heat can pop bubbles in liquid epoxy during the first few minutes of a pour, applying it to a cured floor will only burn the material or cause it to delaminate. Hardened haze requires sandpaper and mechanical force to remove the affected layer, not high temperatures.
Does humidity really matter if I am working inside a closed garage?
Humidity is a major factor even in closed garages. Standard garage doors aren't hermetically sealed, and moisture vapor can easily migrate through the concrete slab or the air. If the ambient humidity is above 60 percent, the risk of a chemical blush remains high. Professional artisans always monitor the environment regardless of whether the doors are shut.
What is the best temperature to apply epoxy to avoid a foggy look?
Aim for an ambient temperature between 65°F and 75°F for the most reliable results. More importantly, your concrete substrate must be at least 5 degrees above the dew point. This prevents invisible condensation from forming on the chilled slab and trapping moisture under your coating, which is the primary cause of a foggy, disappointing finish.